Search This Blog

Showing posts with label craftivity. Show all posts

Thursday, February 9, 2023

It's About Time for Presidents Day!


I reached into the archives to pull out this craftivity.  It's a fun way to make a Presidents' Day display.  


For every student you will need 1 sheet each of red, white and blue construction paper.  I used 8" x 8" square sheets, but you can avoid a lot of cutting by using 9" x 12". You will also need cardboard patterns of Washington & Lincoln.  I found silhouettes online, printed them, and then traced them on cardboard.  Cut them out and your resources are ready.

Since paper weaving has been around forever, I'm assuming you know how to create the woven background.  After each student has chosen which 2 colors to use for the weaving part, ask them to exchange 1 of those sheets for about 6 - 8 pre-cut strips of the same color.  I supply the 1" strips.

When the weaving is completed, each child should borrow the silhouette pattern of their choice to trace on their remaining sheet of paper. 

The beauty of this project is that by encouraging your students to choose 2 colors of their choice for the background, saving the 3rd for the silhouette, you will give your classroom a burst of color without having all 20+ projects look the same. 

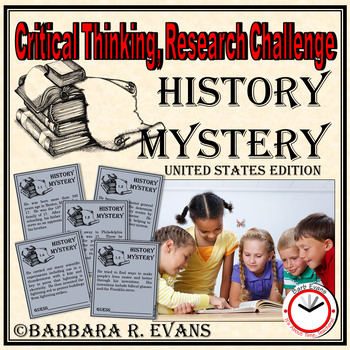
Following are some resources for Presidents' Day that I think you will love:


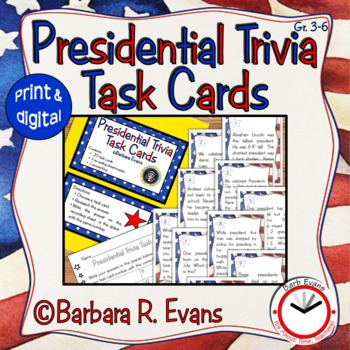
These products are not specifically for Presidents' Day, but rather for any patriotic holiday.


This one is FREE!


Wednesday, July 13, 2016

When It Rains, Make Forest Animals!

It rained torrents for the entire 4th of July weekend and I had a house full of family and friends. We had planned to boat and ski and swim and float and grill out and...  

Mother Nature did not cooperate.  


So there I was with a house bursting at the seams, including 10 children ages 10 and under. We have very few toys at the lake house. It's best suited to outdoor play. So, being the teacher that I am, I grabbed the art supplies I had and organized the kiddos to make forest animals. I gave them 1 caveat: they had to use hearts to make the animals because I love forest friends.

Here's what they made:
  • hedgehog

 
  • bear
 
  • dragonfly


  • fox
  • bee
  • owl


  • beaver


  • ladybug


  • butterfly


  • raccoon


Not bad for a spur-of-the-moment activity. These and similar craftivities will definitely be undertaken in my classroom this fall.


If you love forest friends, too, you may like these products:


Sunday, May 22, 2016

It's About Time for Memorial Day!

It's about time, teachers, for Memorial Day!


As the school year winds down, you probably are not interested in deep, intricate lessons, but still want to pay homage to this solemn holiday. So, here's a quick and easy poetry lesson, along with some teaching possibilities that you may wish to share with your students:


And, here are some possibilities for teaching with it:


[This poem and its possibilities are part of Poetry Possibilities - Spring Edition. It is now available in my TPT store for 50% off.]  

Here's a quick, albeit somewhat messy, craftivity for Memorial Day:

Patriotic Chalk Art:


This is one of my all time favorite crafts and is a hit with the kiddos. The piece above actually reflects 2 methods of making the chalk rubbings. One uses the shape pattern and rubs out from the edges; the other uses the scrap or negative of the shape with rubbings going in toward the center.

For the bell images above, provide cardboard patterns for the shapes. Ask your students to trace the pattern on construction paper (color doesn't matter). Insist that they trace the pattern onto another piece of paper because if they all try to rub chalk on the pattern, you will endure many complaints about purple symbols. Each child should use his/her own shape.  

After cutting the shape out, students should generously rub blue or red chalk around the edges of the shape. They MUST do this on what I call a "dirty" sheet, which is actually paper reclaimed from the recycling box. It is essential that they rub the chalk on while on the dirty sheet, then move to the chosen construction paper background. Demonstrate holding the shape securely with one hand while pushing the chalk out onto the background paper with 1 finger (hence the messy part). You can make this project as easy or challenging as you like by making a single shape on the background or using multiple shapes and colors all on the same background, perhaps creating complex patterns.

The negative version of this craft works much the same way. After cutting out the shape, the student should tape the scraps together (see lower left corner) and then rub the chalk around the edges of the missing shape. Again, this step must be done on a dirty sheet. Then, holding the negative steady with one hand, have the children rub the chalk toward the center on their background paper.  

Clean up absolutely requires lots of soapy hand washing in order to prevent chalk smudges everywhere, and especially on their clothes.  

These patterns can be cut out of cardstock or heavier cardboard. You should insist that the students not put chalk on your templates. Who wants to have to remake the patterns year after year????


You may also like these patriotic products:


Monday, October 29, 2012

Ghost Rubbings

Do you have time for a quick, Halloween project?  


Ghost rubbings are easy and fun for any age.


Begin by having your students cut a ghost shape out of construction paper scraps; any color but white.  Using small pieces of white chalk, have them rub the chalk all around the edges of the ghost shape.  A line 1/4" wide should be sufficient.  

I always have my kiddos put their ghost shape on a "dirty sheet" (a piece of paper from our recycling box) before rubbing the chalk along the edges. This saves lots of time on clean up!

Next, have them carefully put the ghost shape on the black paper with the chalked side up.  While holding the center of the ghost shape steady with one hand, they use a finger from the other hand to rub the chalk off onto the black paper.  

They should always rub in 1 direction - from the ghost shape out.  Rubbing back toward the ghost shape can cause the ghost shape to tear and/or the outline to blur. It's important not to let the ghost move around while rubbing.  

Once they have rubbed the chalk line around the entire ghost, remove the shape.  


Oooooo.  Now use the piece of chalk to add facial features.


For even more fun, repeat the process, making additional ghostly images elsewhere on the black paper.  If your students want 1 ghost to appear behind another, tell them not to rub the chalk off where the ghost shape touches the 1st ghost.  


Just in time for Halloween, It's a Spooktacular Sale on TpT! 


A bunch of sellers have joined forces to make this a Howling good sale, myself included. On Halloween ONLY you can get 20% off of everything in my store.  If you visit JD's Rockin' Readers, our hostess, you will find links to every store that has joined this event. Hurry! The clock is ticking!